 |
| Finishing touches - smoothing out the stove |
One of the problems that the migrant communities face within daily life is the access to combustible material (primarily wood) in order to burn for cooking purposes. In India, you often see communities that heard cattle making patties out of the cow or buffalo dung, which they then dry out to use as fuel. However, with the Trash Picker community in Adampur, they have few assets, and certainly do not have the finances to procure the most cherished of animals, a cow. With limited resources and little availability to cow excrement, we had to come up with a solution to try and make cooking less burdensome.
Here at ViKAS we are pretty resourceful folk, although, it is still crazy to think that you can make a fully working, fuel efficient stove in under two hours out of, well... poo, mainly. Structurally, all you need is two plastic buckets, to form the basic mould of stove around. Then for the material: natural clay (5 buckets per stove) FRESH cow dung (3 buckets) natural sand (1 bucket) and water... Oh, and of course, lots of enthusiastic interns, and some local know-how!
 |
| Every stove has to start somewhere... |
- Set the wider of the plastic buckets on its end, and the narrower bucket perpendicular against it (this will form the negative space where the fuel is inserted and burned).
- Combine clay, dung, and sand, and mix it at first with a shovel, then thoroughly by hand until there is an even consistency. Add small amounts of water as needed, to bind.
- Take 'snowballs' of the mixture and throw it against the two-bucket structure in order to expel all the air from the material as you build.
- Hold boards around the area to define the stove's shape as you throw.
- 4-6" up, place a stick perpendicular to the upright plastic bucket (this will form the negative space where the smoke will escape from - a chimney).
- Continue throwing balls of the mixture, and sculpting with the boards until the stove reaches 8-12" tall.
- Place the family cooking pot on top of the upright plastic bucket and continue throwing the mixture around the base of the pot - to form a custom fit of the pot to the stove.
- Smooth out the shape of the stove with boards, and by hand, decorate if you want!
- Allow the stove to dry for two weeks with no use whatsoever. Cover well with tarpaulin in order to prevent any moisture getting to the completed stove.
 |
| The finished article. Now to let it dry!! |
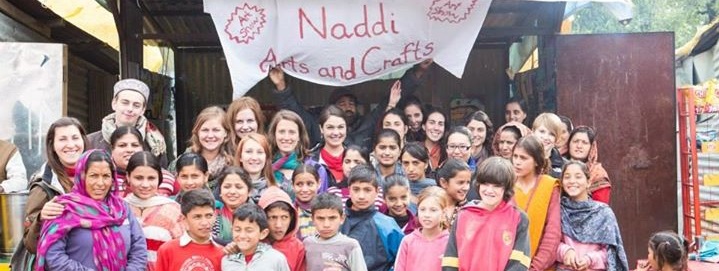
This was the process that we followed for the first of our stoves that we built, which turned out to be a great success. We managed to engage with the local community, as our willingness was met by the whole of the Trash Picker community who came over and offered advice, suggestions and praise!
 |
| Everyone involved - the community loving the new stove |
Looking forward, hopefully we can replicate this activity with the marginalized communities that we work with in both Janauri and Dosarka, as well as amongst the Snake Charmer's who are settled in Adampur too. With this project, involvement is key, as the more the community helps, the more they will learn, and the more they will gain a sense of belonging over the end product!
And for us, well, we are just pleased that we can help introduce:
- A 60-70% reduction in fuel consumption
- Faster cooking times
- A reduction in carbon emissions
- Fuel cost savings
- Less time spent collecting wood for fuel
- Forest tree conservation

No comments:
Post a Comment